A Beginner’s Guide to Sous Vide Beer Brewing
Sous vide has along been established as an excellent way of cooking meat and veg, not to mention even dessert in a jar. But sous vide is good for more than just breakfast, lunch, and dinner. It can also take care of your aperitif through sous vide beer brewing, to appropriate a phrase.
Yes, sous vide beer brewing is possible.
In this article we will introduce you to the wild and wonderful world of sous vide home beer brewing, including details on basic techniques and why sous vide is perfect match for making an out-of-this world home beer brewing experience come true. In later articles we’ll walk you through some of our favorite recipes, but this is a good place to start!
And, yes again – you should absolutely give it a shot.

Getting Started: Sous Vide Beer Brewing Terms
There are three primary methods of brewing beer at home, whether using sous vide or otherwise.
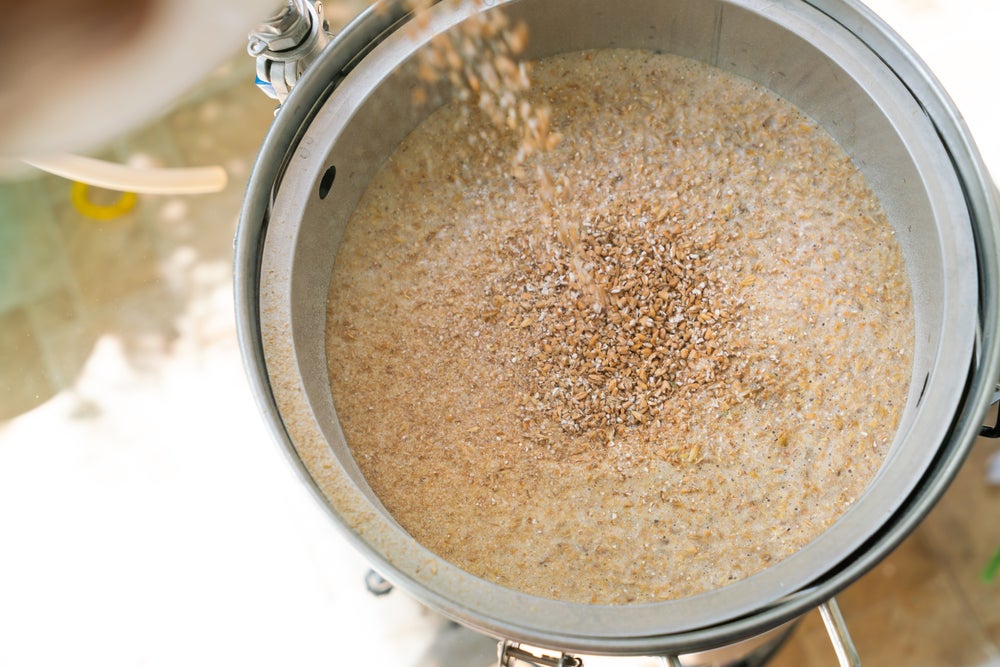
The first is all-grain brewing. This is done by soaking crushed, malted grains at a steady boil over a long period of time. The resulting sugary liquid is what we call wort. The other option is extract brewing. This refers to quickly creating your own wort by instead dissolving a malt extract in water with some steeped, specialty grains for an extra kick.
If you’re unfamiliar, beer brewing regardless of technique breaks down into four general phases:
- Preparation: gather and sanitize all of your equipment (check out some of the brewing kits on Amazon for a primer)
- Brew and Boil: This stage is designed to process your ingredients to produce a good wort, the basis of good beer – this is also when hops are added with all-grain brewing.
- Ferment and Forget: This is where you transfer the cooled wort into jugs with air locks for a stay in the long dark.
- Bottle and Bask: Again, make sure to sanitize all of your bottling equipment – after two weeks at room temperature your brews will have had enough time to carbonate.
All-grain brewing is known for producing brews that are highly customizable. This is because you typically add hops at regular intervals, followed by raising to a boil, and repeating to layer complexity of flavor. A simple bitter can take less than three hours while more delicate beers like pilsners can take up to eight hours. Extra brewing is a quicker alternative, but has a few key drawbacks. Chief among these is that extracts already have a defined flavor profile.
To summarize quickly:
| Pros - All-grain | Cons - All-grain | Pros - Extract | Cons - Extract |
|---|---|---|---|
| Total Creative Control | Requires more Equipment | Consistent Brewing Results | Extracts are Expensive |
| Grains are Cheaper in Bulk | Longer Brew Times | Faster Brew Times | Limited by Extract Profile |
The in-between option for the sous vide home brewer is the partial-mash approach, which combines parts of each technique. This allows for some of the creativity from all-grain brewing and some of the ease-of-use associated with extract-based beer brewing.
The process for this is simple. As with the all-grain method, you conduct a small mash where you retain the run-off from processing the grain. This is then added to the extract brewing process described above.
From there you proceed as normal, but with some of the creative control that comes from mashing with all-grain. If you’re unfamiliar with the essentials of beer brewing we suggest you check out this article and this article for a more in-depth look at process.
Sous Vide Guy recommends the partial-mash approach, for reasons we’ll get into in just a moment.
So why Sous Vide beer brewing?
Sous vide is an extremely precise method of cooking. Beer brewing is just as precise an art. After all, even grain steeping relies on stable temperature to produce the best results.
As sous vide cooking is precise enough to cultivate yeast it can also be used for all of the varieties of sous vide brewing discussed above. Sous vide beer brewing comes into play during the brew and boil stage. Rather than using just a stove-top element, we use an immersion circulator or the like to gently heat a paint-strainer bag loaded with our grains.
Although your recipe time will vary you’ll still need to reach a roiling boil at the end of the brew. Sous vide helps here too as you have two heat sources to speed up the boil. Adjust your sous vide water bath to a high boil (190 degrees Fahrenheit, or 88 degrees Celsius) and turn the burner beneath your pot on to high.
Following this you can proceed as usual – whether sparging, mashing out, or rinsing the grains. This is also when you can begin adding your extract if using the partial-mash method.
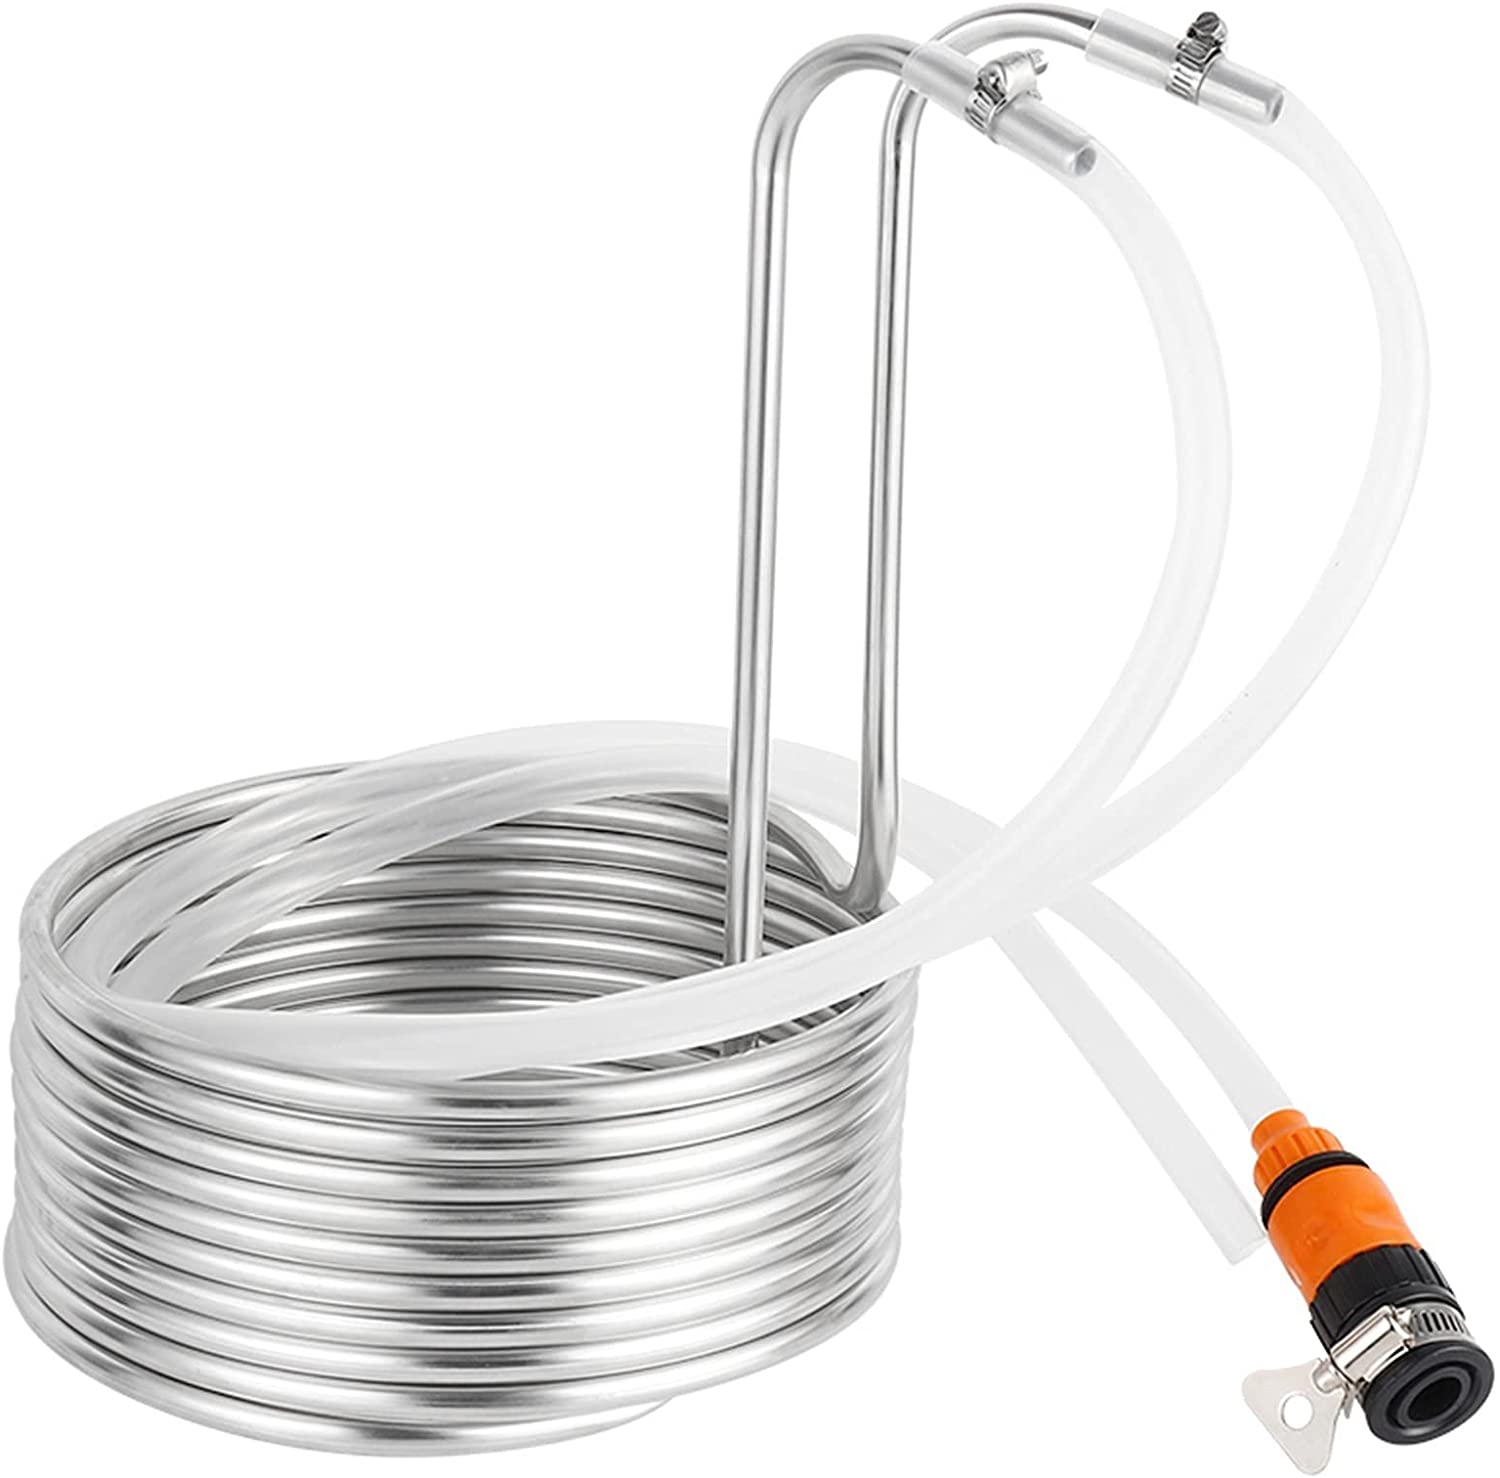
Another major aspect of beer brewing is managing wort temperature quickly and effectively. Likewise, sous vide dishes that aren’t served immediately need to be rapidly cooled through precisely this same ‘danger zone’ to avoid bacteria growth.
For home beer brewing you can’t go wrong with wort chillers. These work a little like immersion circulators, but with cold rather than heat. This chilling process can take less than 20-minutes to chill a standard 5-gallon brewing load.
Although you can kind of replicate this effect with a sink full of cold water this method is substantially less heat effective.
The big take away here is that, provide you know what you’re doing, you can finish a brew within two and a half hours. This is a great way to do test batches for full production. It’s also a fantastic way to experiment with a wide variety of hops, grains, and extracts without having to commit to a long brew.
Photo credit: Rido/Shutterstock; ArtemSh/Shutterstock; jannoon028/Shutterstock