Sous Vide Beer Brewing: 3-brews in 1-day in a Partial Mash
Sous Vide beer brewing is a fun and functional introduction to the art of brewing with a high-tech twist.
As we’ve discussed in past articles there’s a lot to be said for taking the sous vide approach to brewing beer. The key benefits for new brewers is the set and forget nature, not to mention the precise temperature control of working with an immersion circulator. For experienced brewers sous vide allows you to test a variety of brews within a single working day. This is especially true for testing pilsners as they require adding heaps of hops across the boiling period. Our recipe today will use a partial-mash technique augmented with a sou vide immersion circulator. In short, sous vide beer brewing is both a great entry point for new and experienced brewers alike.
In this article we’ll walk you through everything from the ingredients you need to necessary equipment and extras aplenty.
Let’s get to it.
Ingredients and Equipment
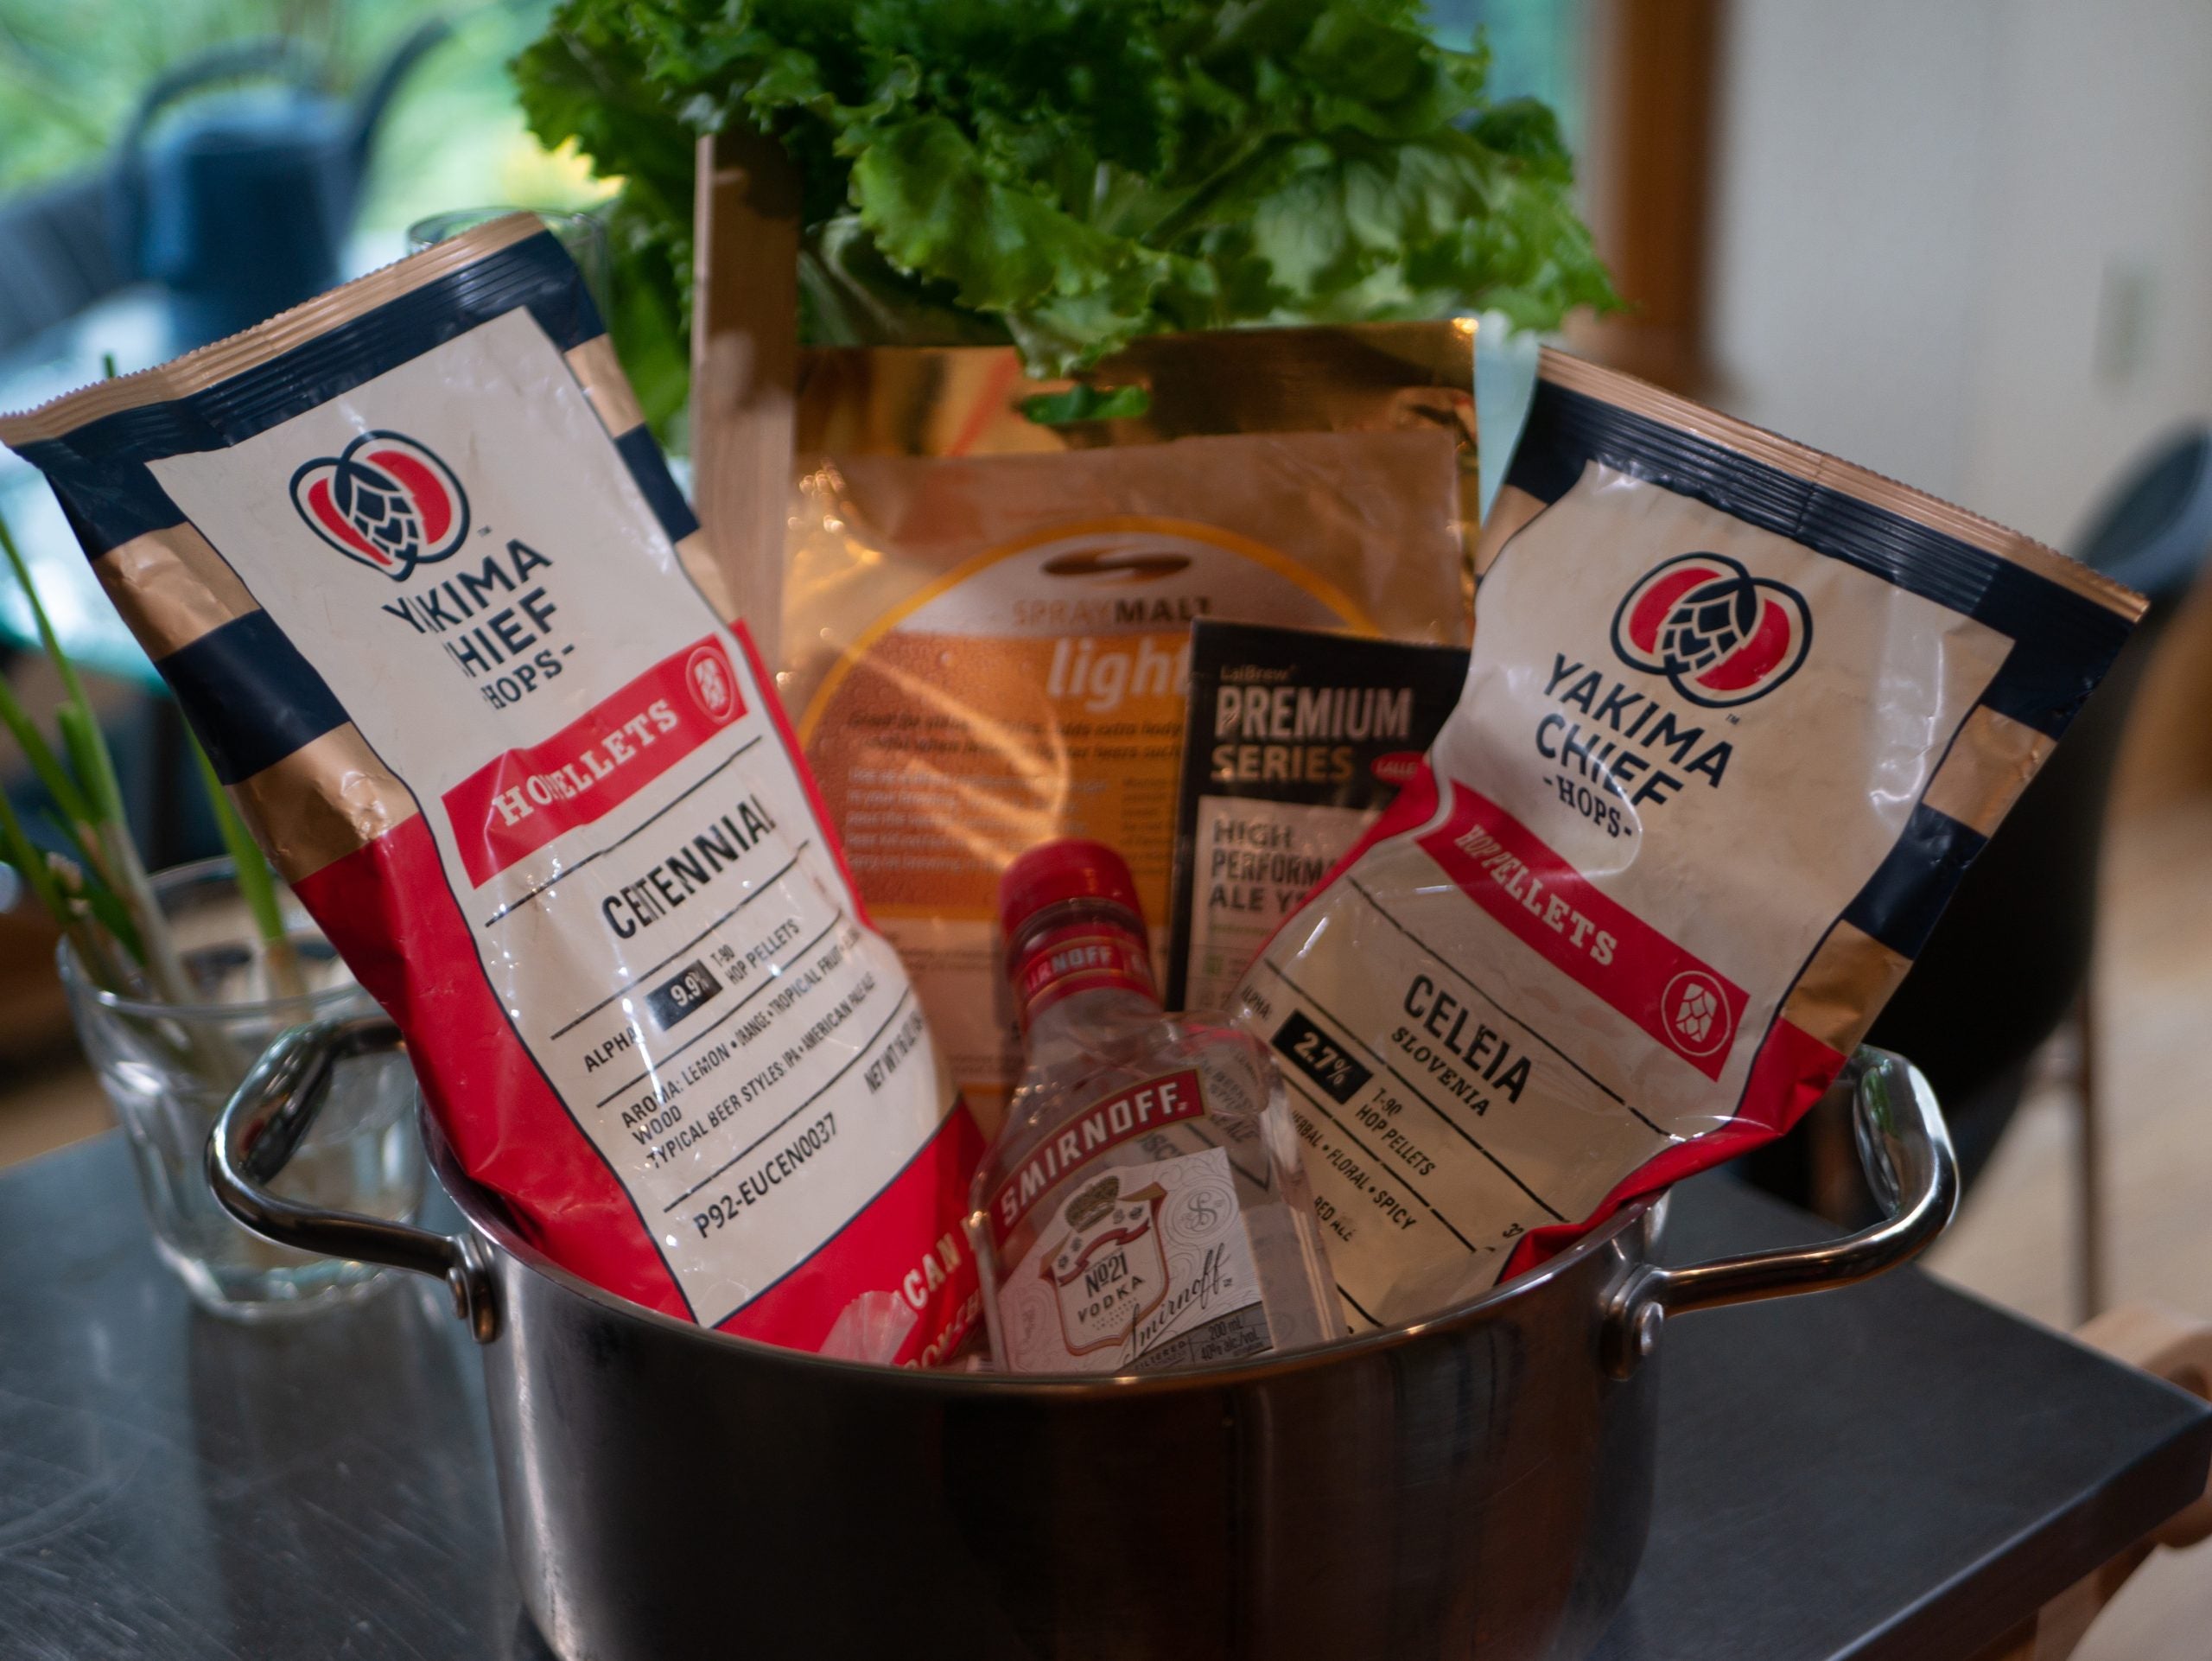
To get started, we selected our hops, yeast, and malt extract. For this recipe we used two hops; Centennial and Celeia, both from Yakima Chief. We also picked up the yeast and all-grains from local suppliers. The yeast was a fairly standard ale-style brewers yeast, which you can typically find for less that $5 USD at most retailers or on Amazon.com. We also used milled Vienna all-grains kindly provided to us by one of our local breweries. Eagle eyed readers will have also spotted a small container of vodka in the basket as well. We’ll get to that during the post-brewing process (hint: it’s not for celebrating a long day’s brew). In terms of a full list of ingredients, including measurements, see below:
- 2 lbs Vienna all-grains
- 500mg light spray malt plus water for dissolving
- 30g of Centennial Hops
- 15g of Celeia Hops
- 1 packet brewer’s yeast – we went with an ale base
- 5 gallons of water for both the kettle and 2 gallons for sparging the grains
- 6 oz vodka or another neutral flavor alcohol
The general ingredient workflow starts with the all-grains and water to produce wort, followed by adding the malt extract for depth, and finishing with the hops during a 1-hr boil.
As for materials, you’ll need the following:
- Brewing Kettle
- Sturdy wooden spoon
- Grain bag and clips
- Ingredient bowls
- Scale
- Bubble locks
- Carboys
- Bottles and caps for bottling – although we used mason jars
- Strainer for the filtration process
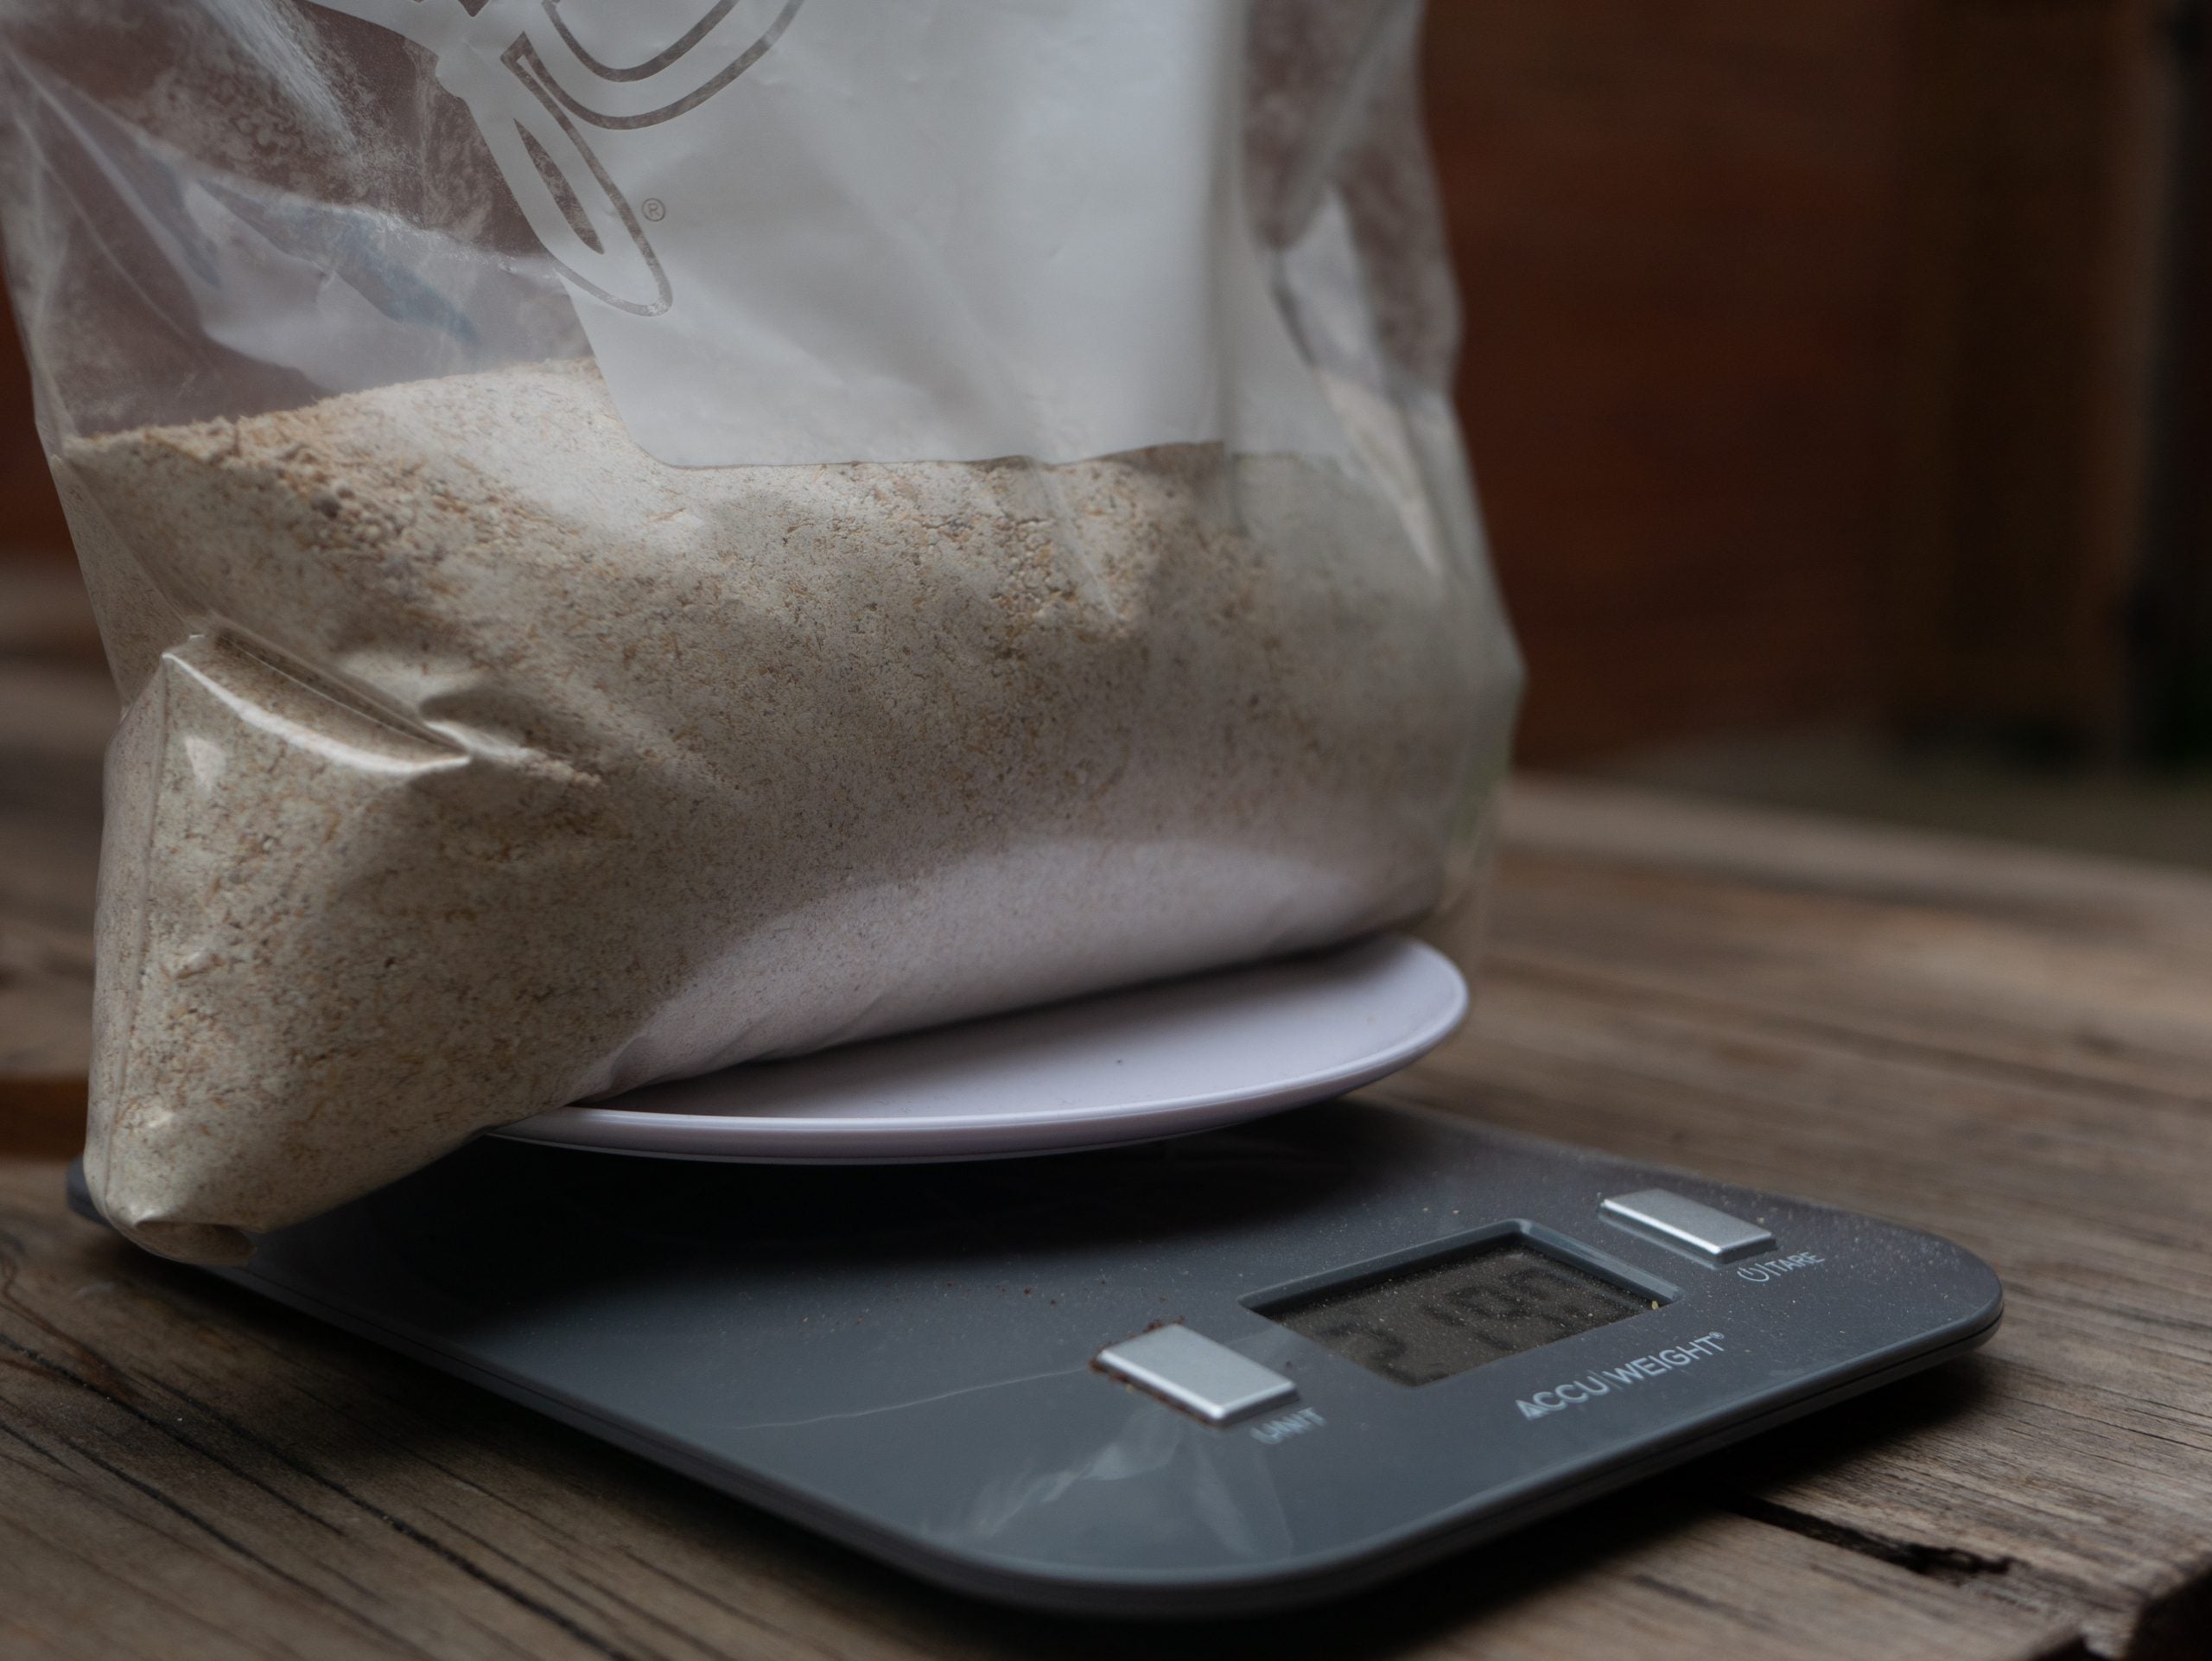
All told we started with 2 pounds of milled all-grains. This acts as the base for the rest of our ingredients and is where the sugar content comes from, which is essential for the fermentation process. You’ll also note that we’re using malt extract here as well, which can be substituted for the wort we’re making. However, it can also be added to enrich the flavor of the brew even if you’re making your own wort with all-grains.
Brewing Window
Our hybrid method involves circulating the water while the grains are soaking in a grain bag clipped to the side of our brewing kettle. This is an easy way of creating your sugar water, or wort – just make sure that there’s minimal leakage of grain fragments out of the grain bag. You can expect to have to do some cleaning afterwards, but making sure that your grain is milled correctly will go a long way to mitigating this issue. We don’t want an overly sticky impeller after all.
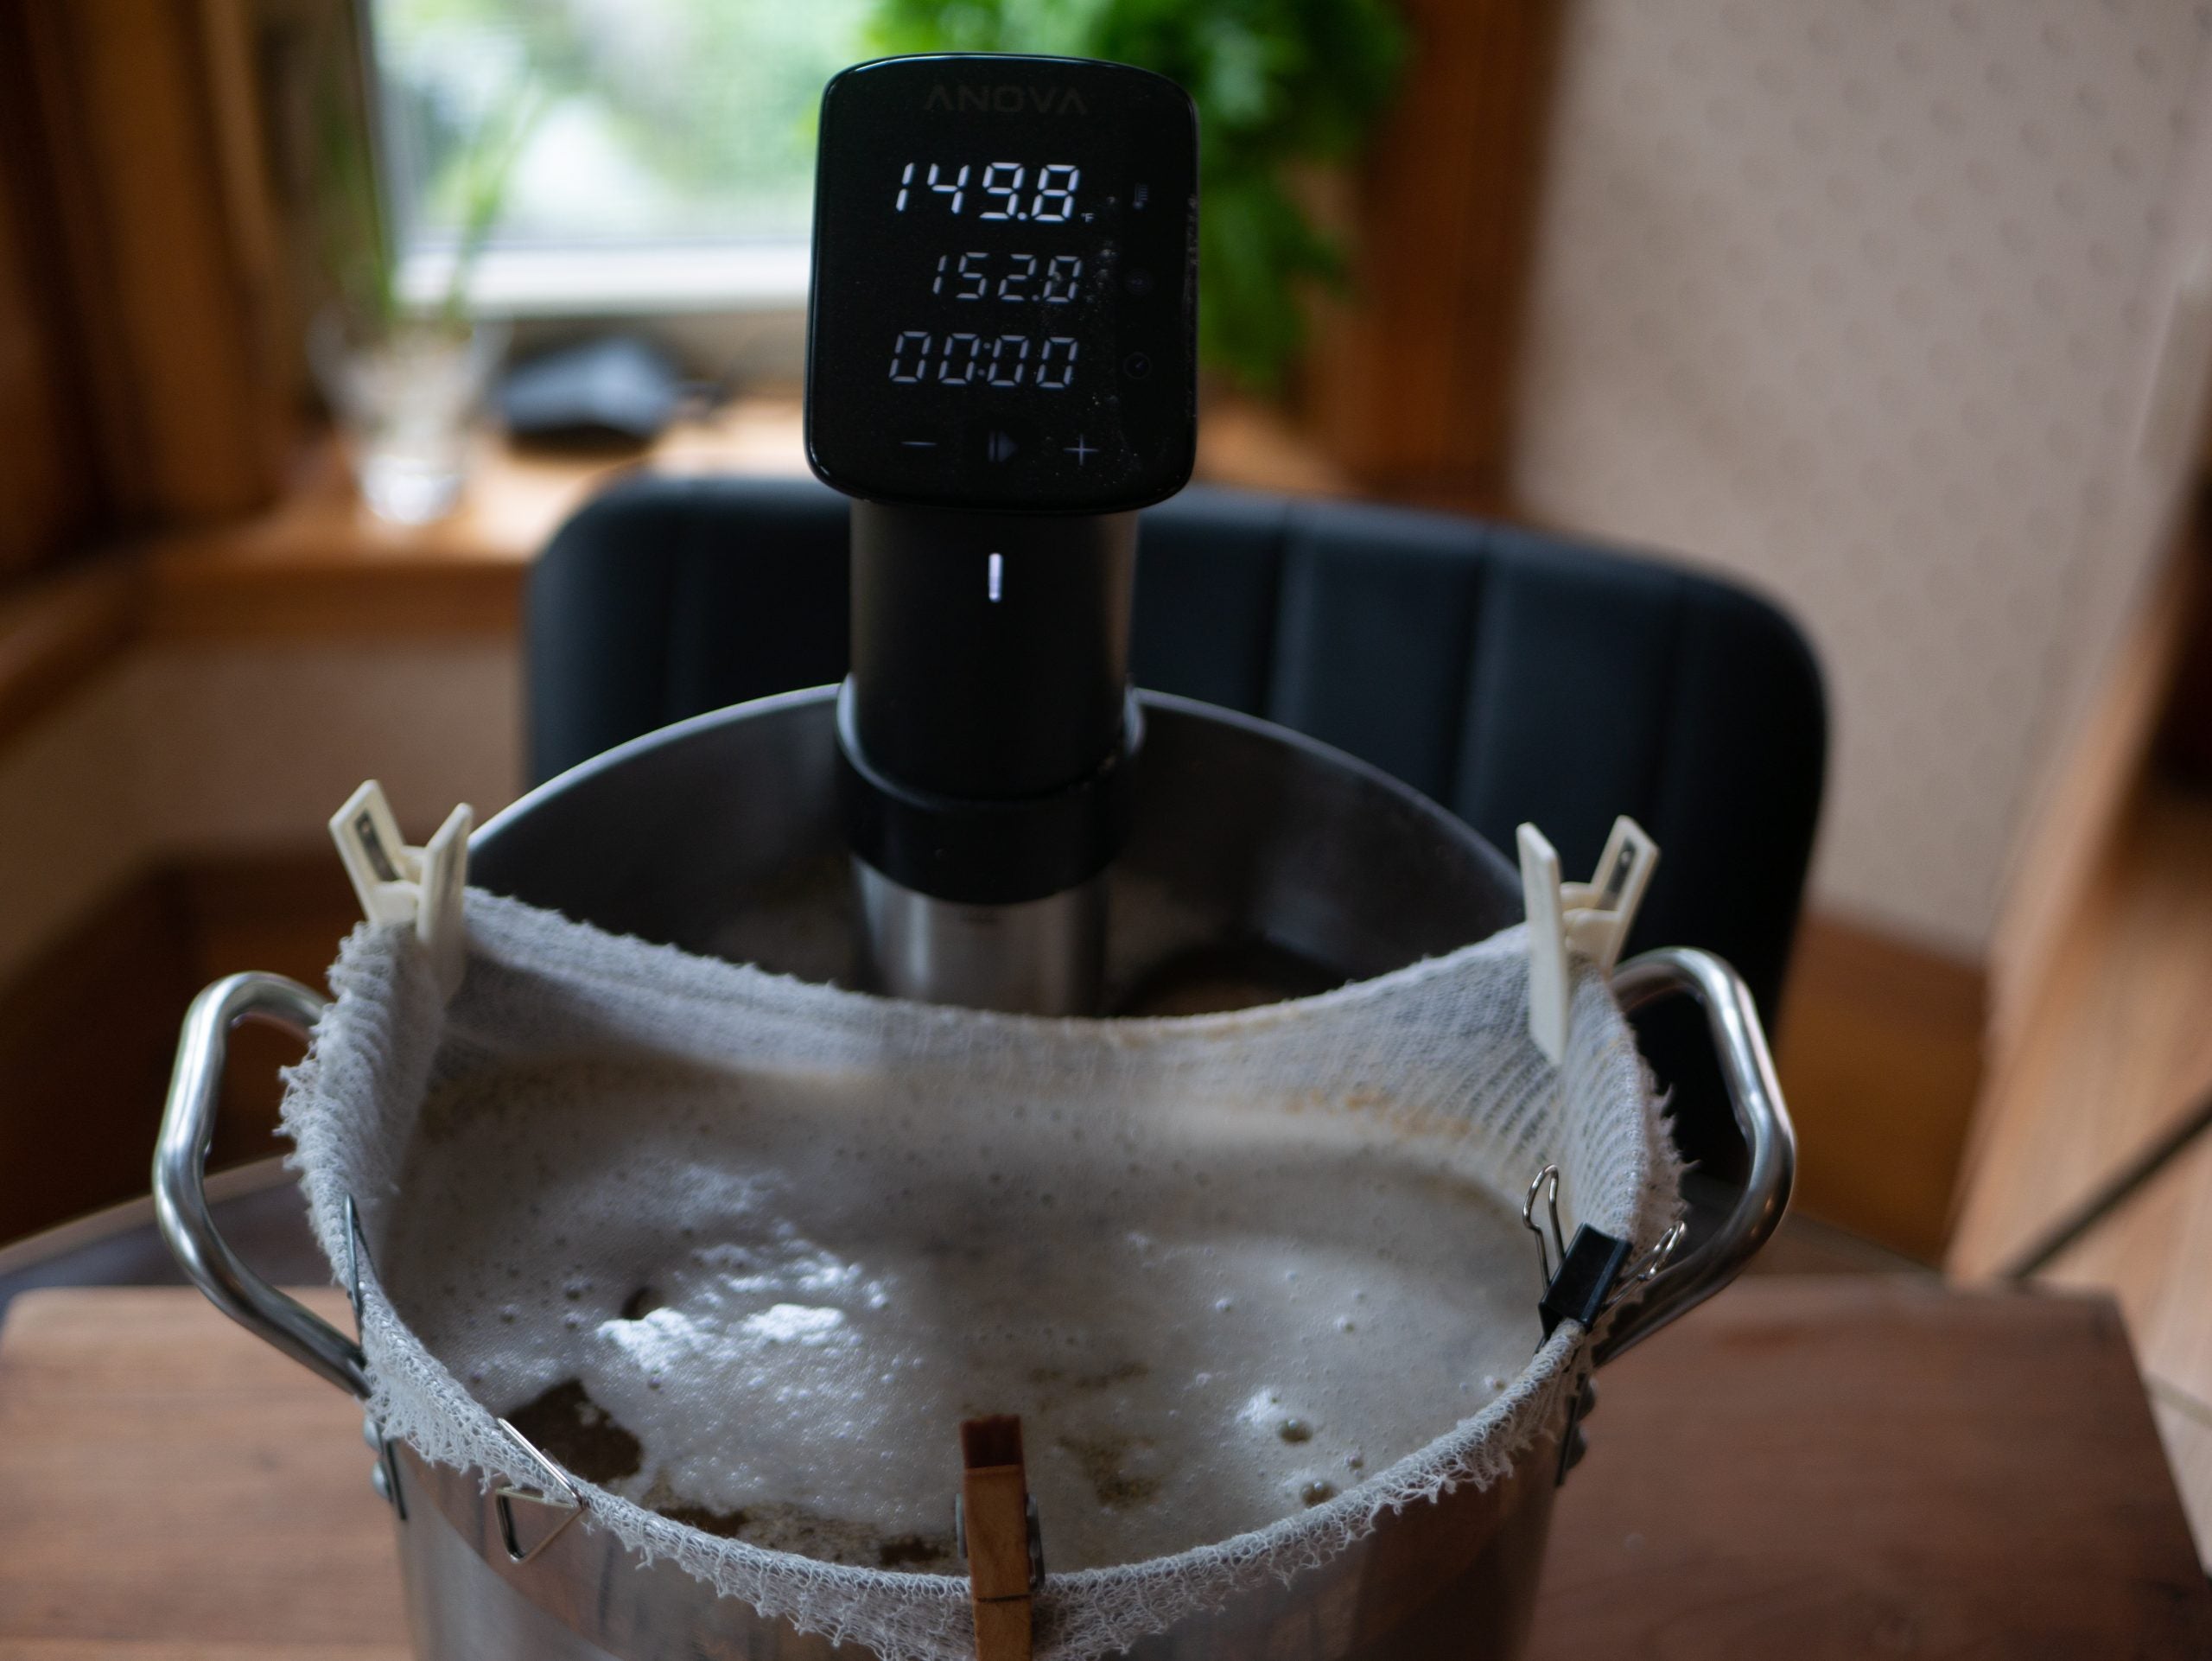
From here we set the brewing kettle to boil at 155 degrees Fahrenheit. This is called steeping the grains. During this point we also want to stir the grains using a wooden spoon. At this point you can kill the heat and let it drop to around 150 degrees.
From here we go through the mash rest, which takes an hour. Halfway through this process we removed the grain bag and place it in a large stock pot. While you get to work with the hops allow it to drain, and feel free to add the extra liquid back into your brewing kettle at the end of the hour long mash rest.
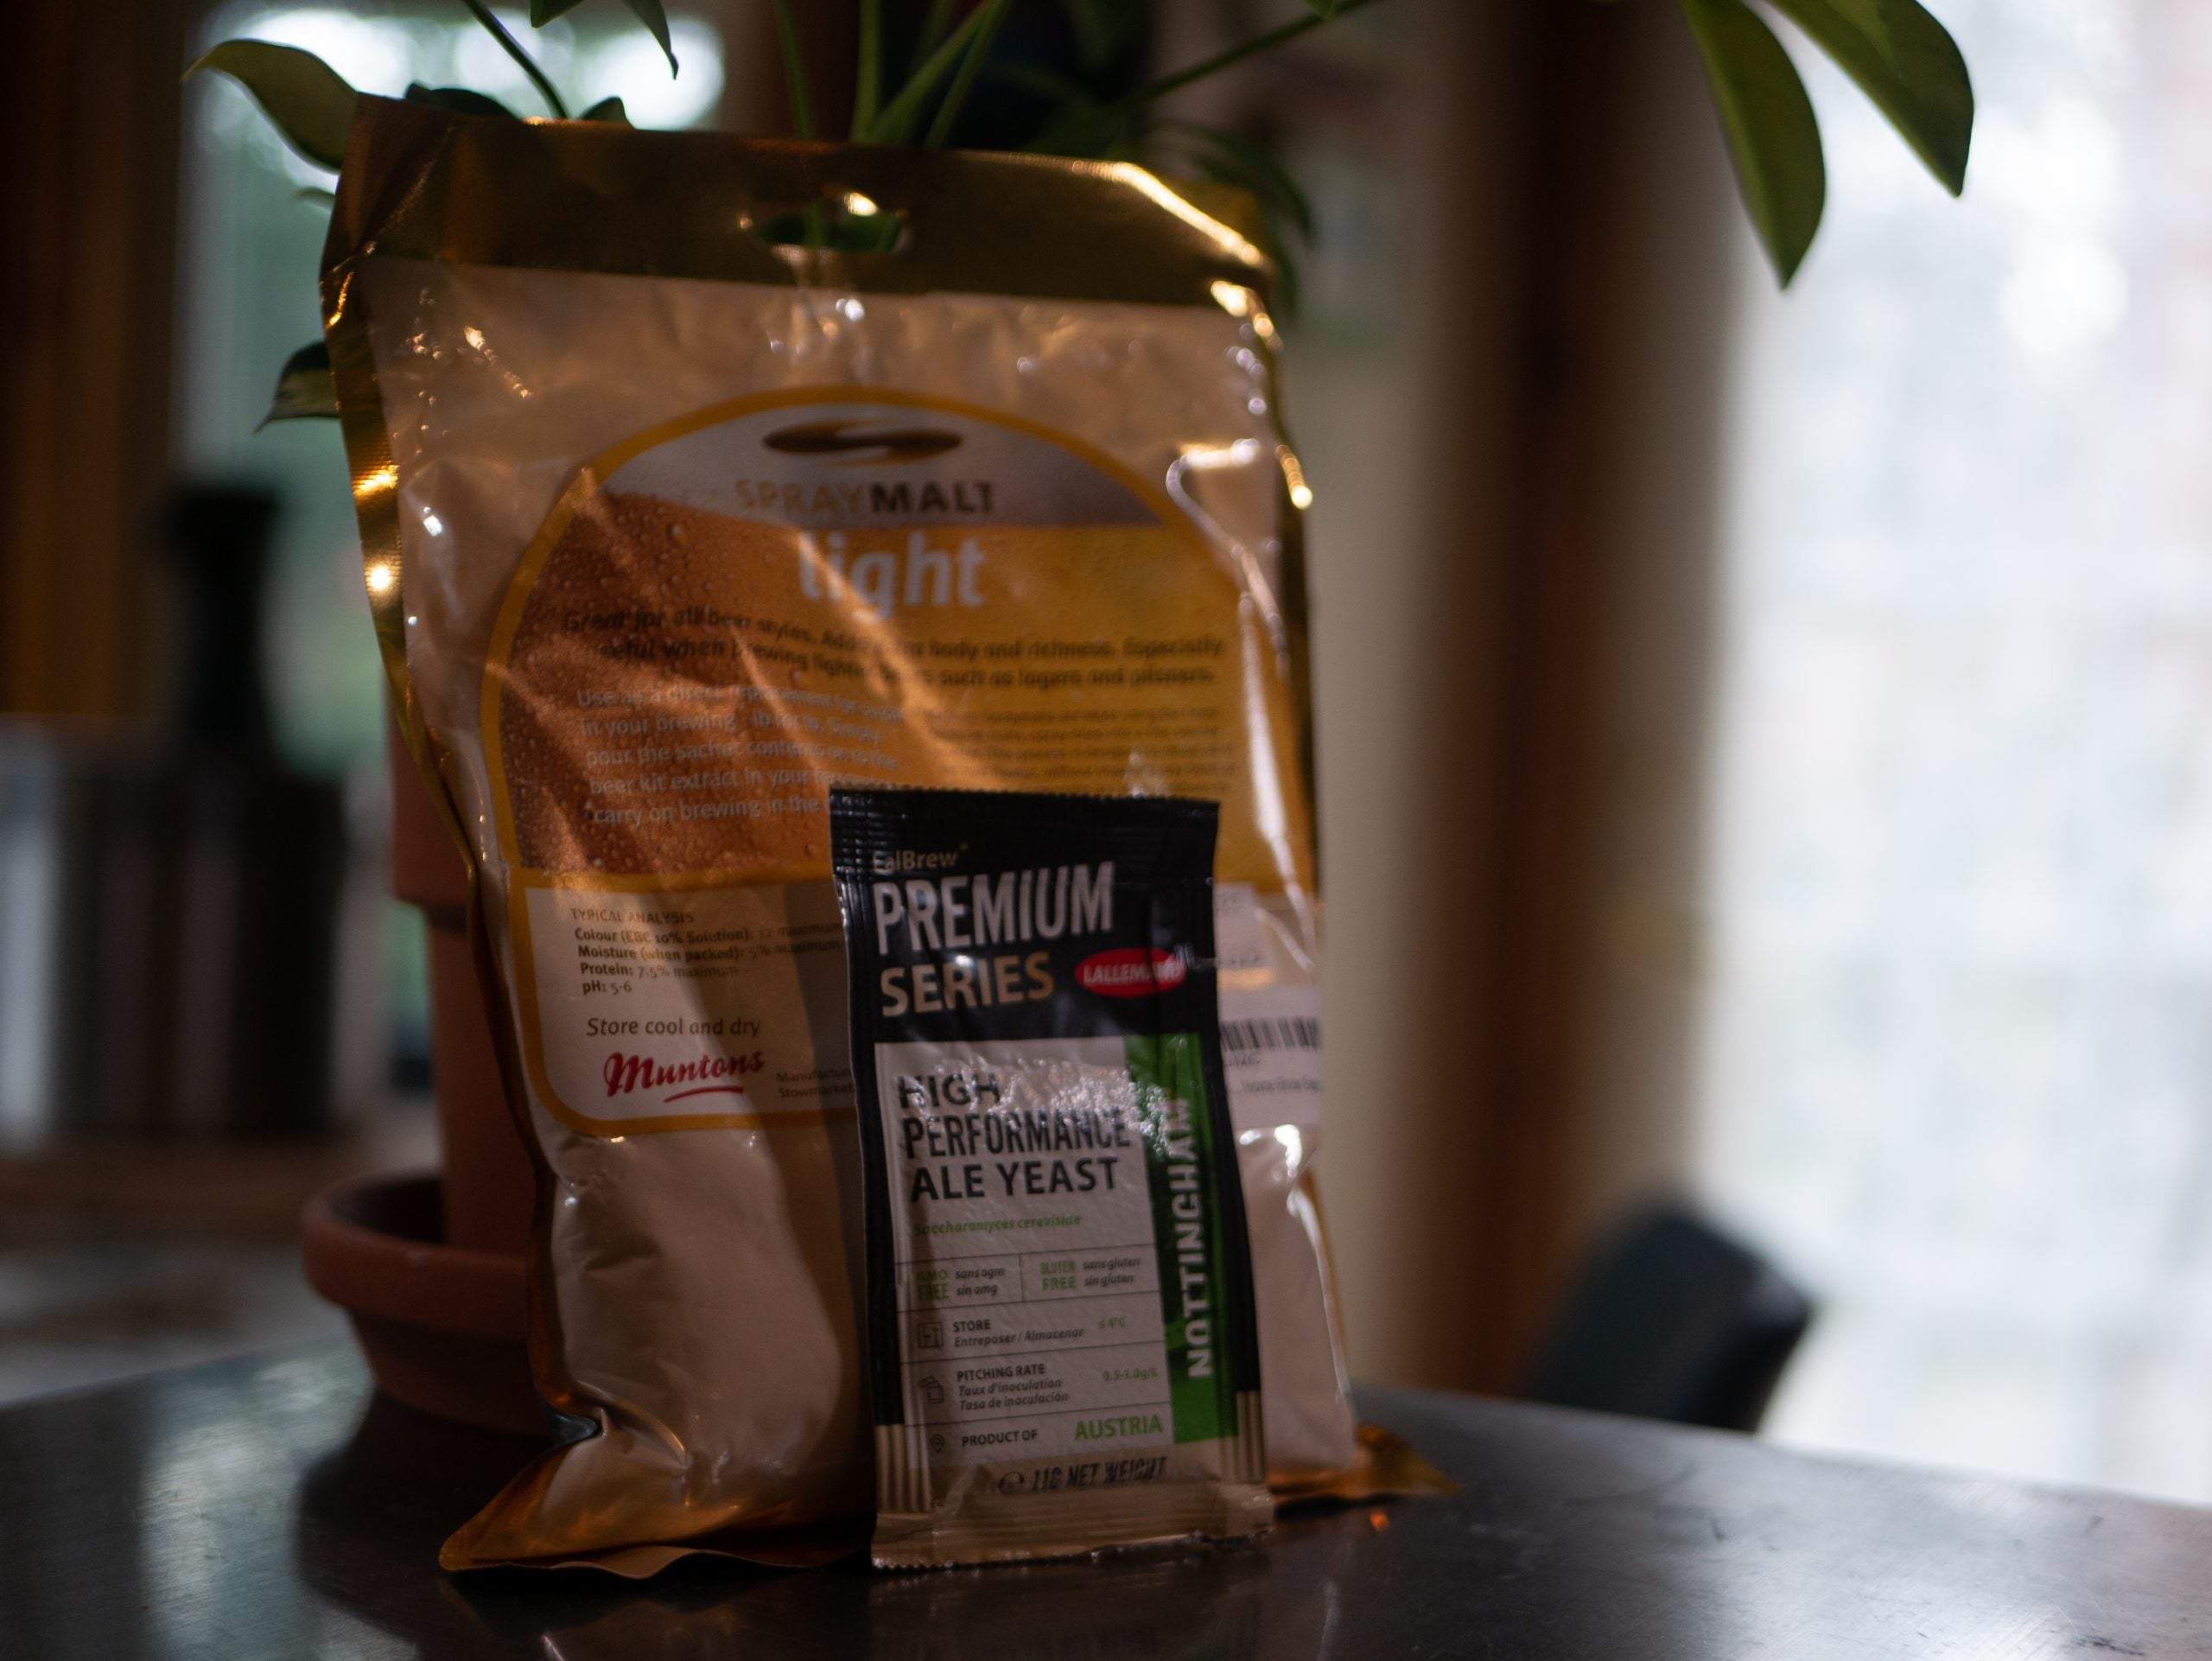
Next we pull the brewing kettle off the heat to avoid burning any malt during the dissolution process. Malt extracts add both depth of color and flavor to our brew.
For this session we used a light, spray malt that is a great all-arounder for many types of beer. Light malts also help reduce any “dryness” in the mouthfeel. Although you can be used to replace sugar in the recipe we strongly recommend using both together for a more robust flavor. This will however result in a stronger body to the beer. Note that when using a dried malt extract like this one you’ll need to combine it with which needed to be combined with water off before being added to the brewing kettle – follow the packet directions. If working with liquid malt we instead recommend warming it in a water bath to help reduce the liquid malt’s viscosity for easy pouring.
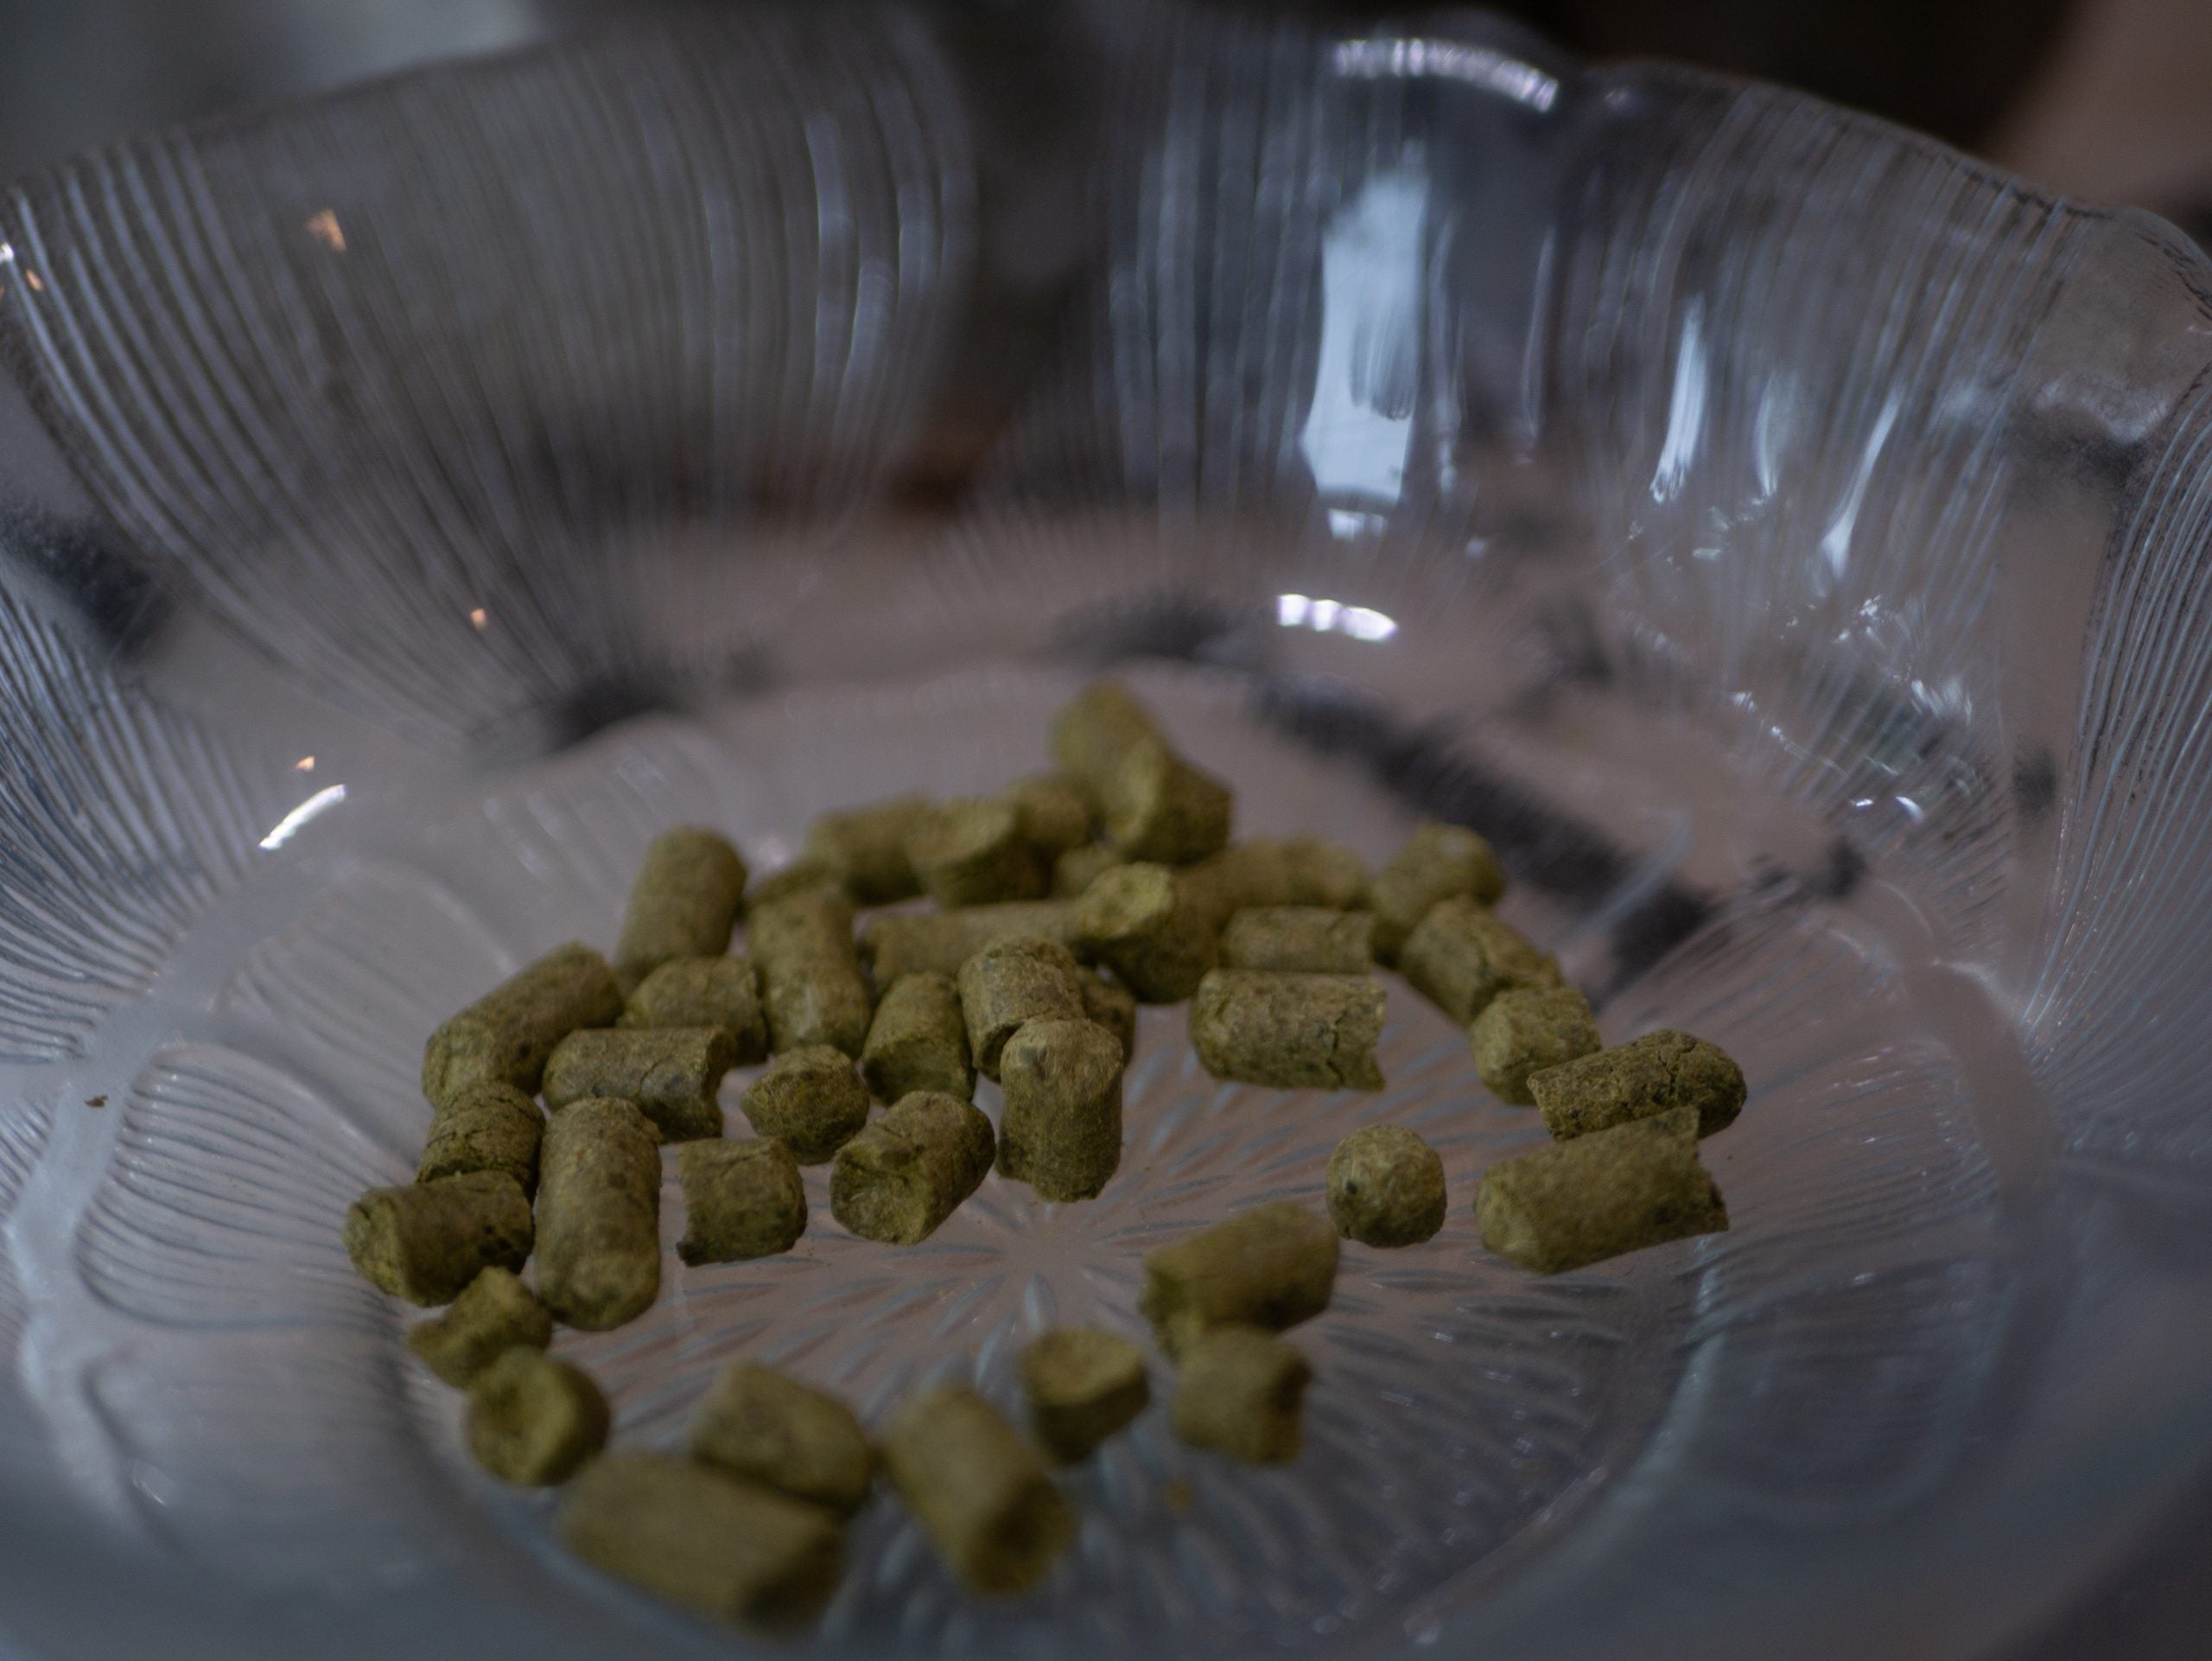
The hops shown above were selected based on their complimentary, fruity flavor profiles, the Centennial is the first to go into the pot and Celeia the second. This two-stage boil gives deepens the flavor complexity of the beer. We were aiming for a woodsy, slightly fruity ale – and got fairly close for a first brew. We kept the hops light in quantity for this base as we wanted to hit more of a fruity ale with less of an IPA style. Often you’ll see between 90g and 120g of hops used in a single recipe.
Generally speaking hops are added in decreasing increments of both weight and time. By this we mean that you add less hops over time and for shorter periods. This is also where we bring the recipe back up to a boil to process the first round of hops.
In our recipe we started out with boiling our Centennial hops for 1-hr total. During this brewing period we finished by boiling the Celeia for the last 15 minutes of the 1-hr boil. This is largely because we want to add layers to the beer without overpowering its base flavor. The Alpha values also come into play here, with the Centennial coming in at 9.9% and the Celeia at 2.7%. Alpha values generally refer to the amount of bitterness added by a given hop, which means that the same hop with different alpha values will create different results. A 9.9% alpha, like the Centennial, will add a solid amount of bitterness while the Celeia at 2.7% will soften it just a little.

Post Boil and Fermentation
After the boil is finished chill the brewing kettle to drop it to room temperature. We did this by filling our sink with ice water and submerging the kettle until we hit our desired temperature while topping off our brew kettle with cold water. At this point we can pitch our yeast into our fermentation vessel after pouring the now cool contents of our brewing kettle into our carboys – this is also where the vodka finally comes into play.
For freshness and sanitation we picked up some bubble locks for our carboys. These are essential for two reasons: 1) they allow gas from the fermentation process out of the carboy, and 2) they prevent contaminants from the outside world from getting into our fermentation vessel. Although you can use distilled water for the bubble lock we prefer to use a neutral alcohol such as vodka for additional sanitation. On that note, as always please fully sanitize all of your brewing equipment. Even trace environmental contaminants can make your beer taste fishy or otherwise somehow off.
At this point there’s not much to do but make sure that our carboys are at the desired temperature. For this brew we selected 164 degrees Fahrenheit, which just so happened to be the ambient air temperature in our basement. After 14-days we were presented with a vibrant brew, that you can see below.
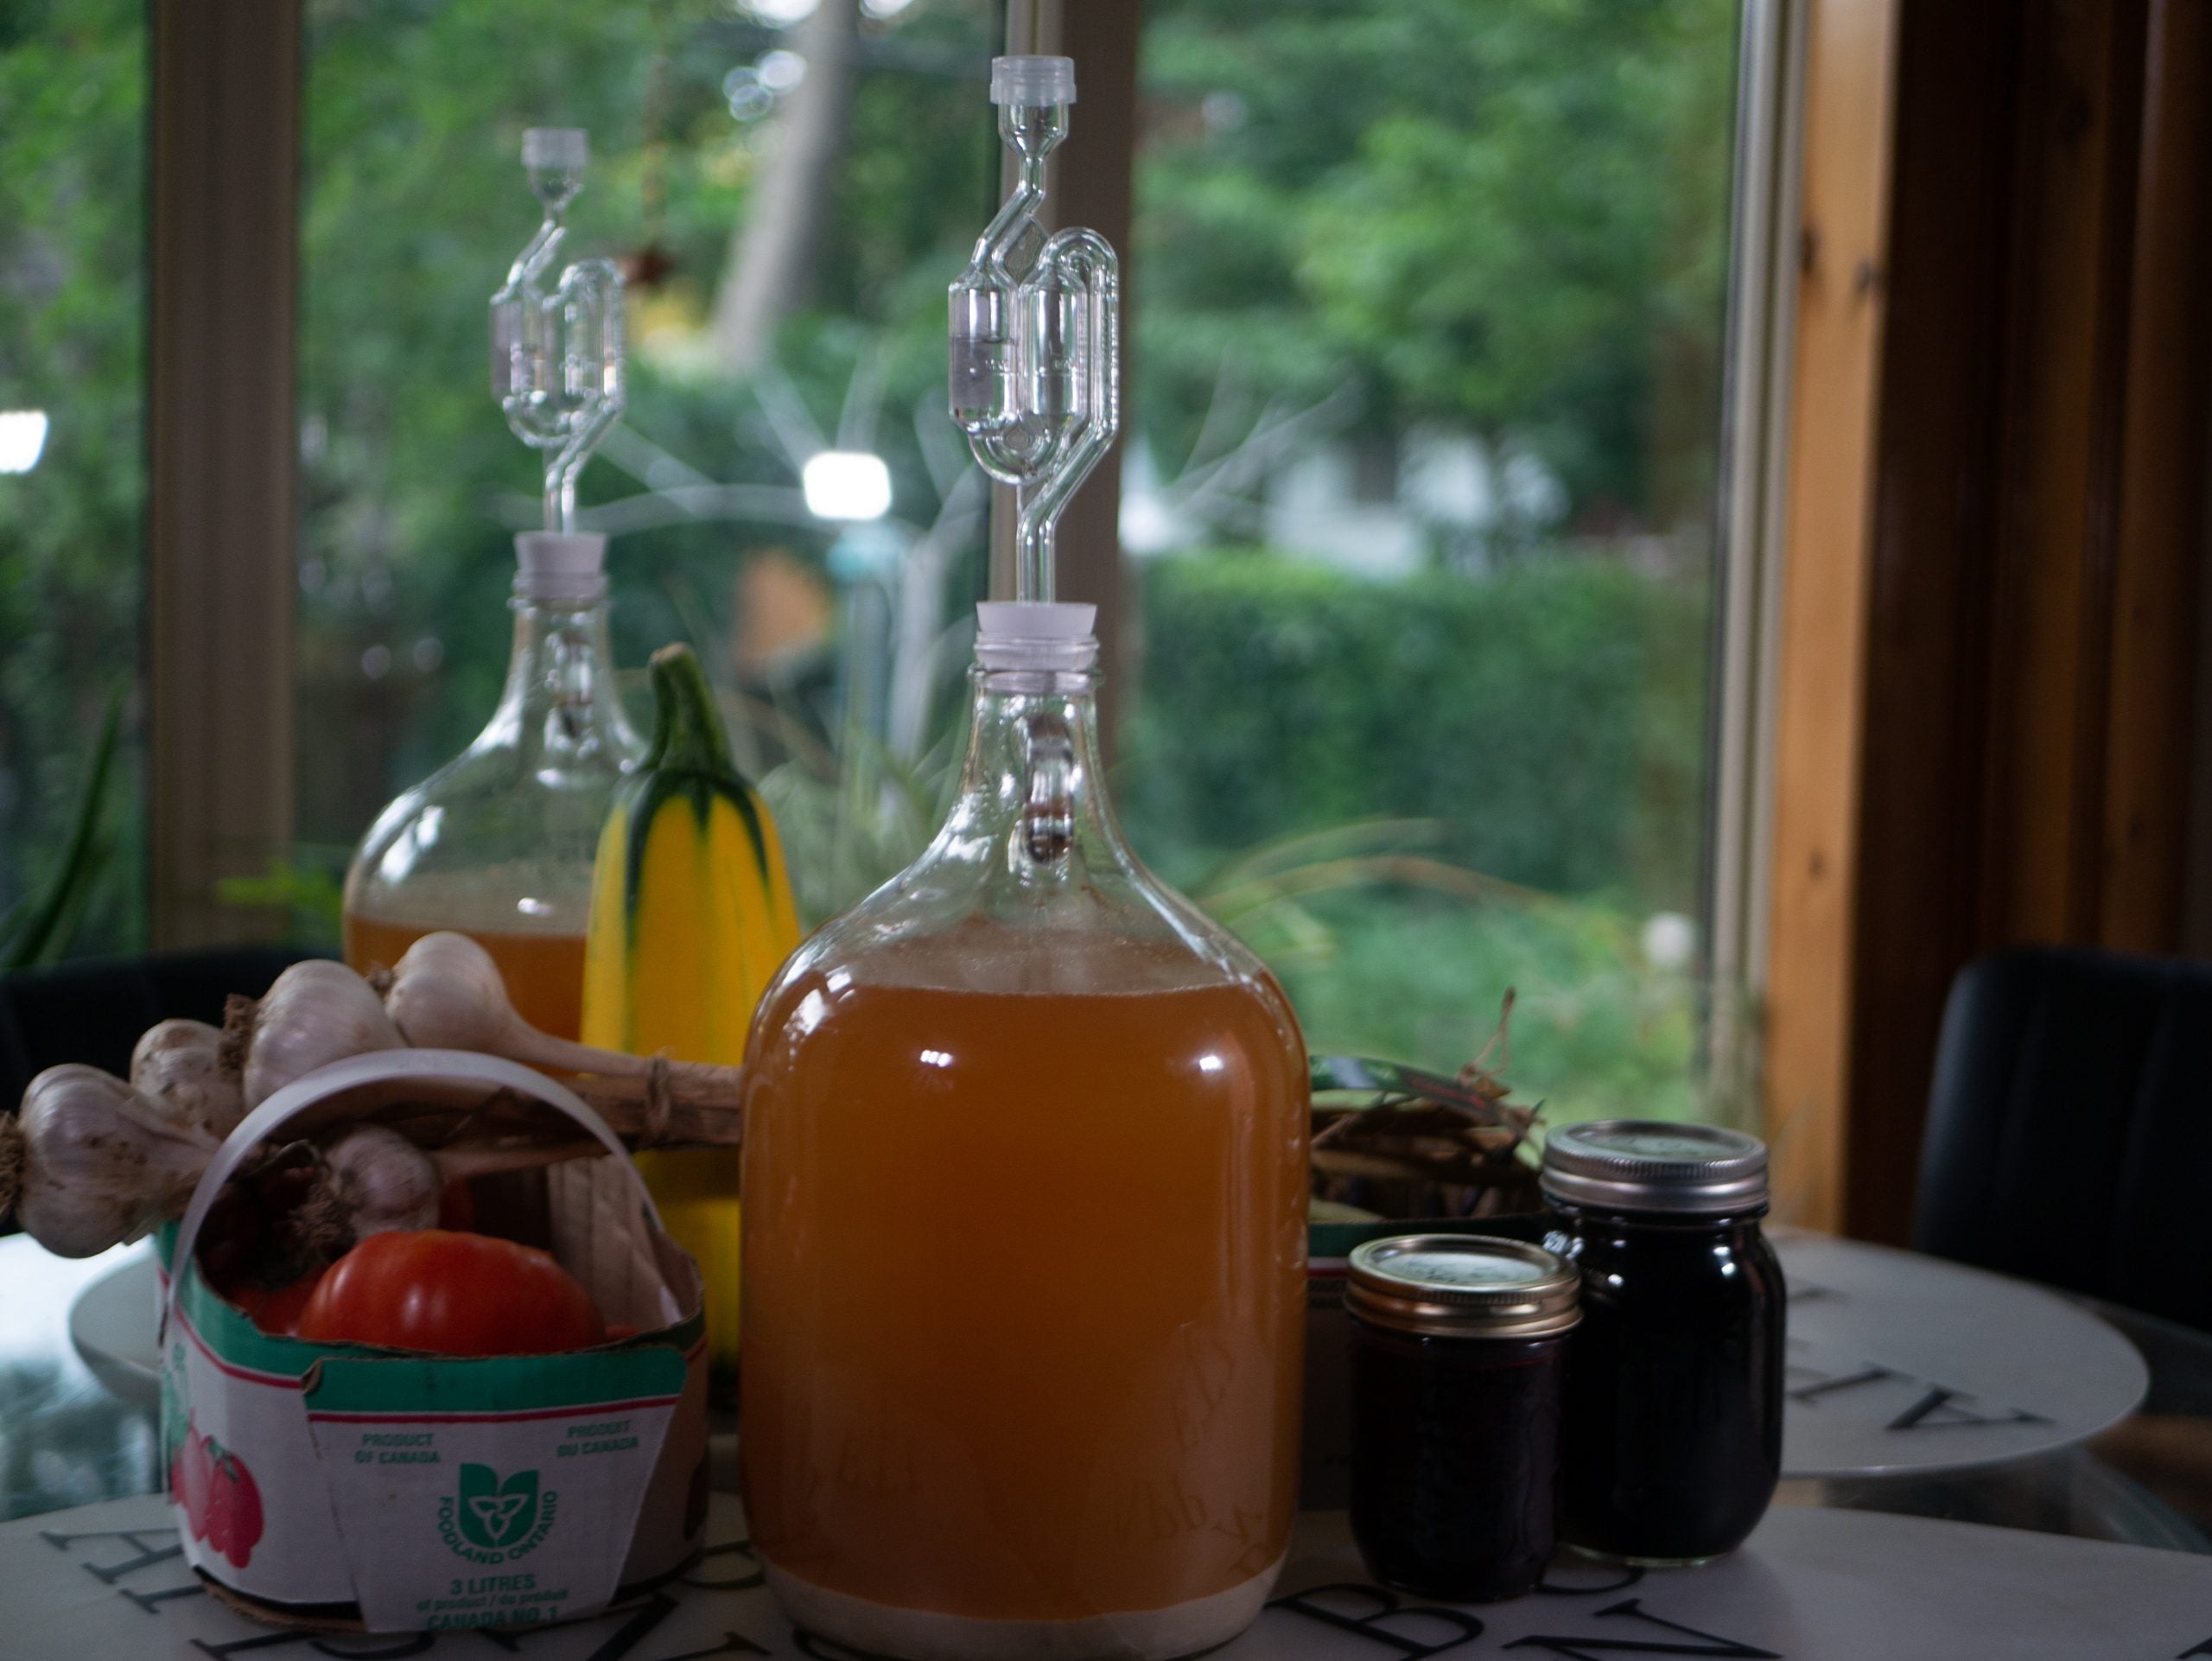
You’ll notice that there’s some significant sediment at the bottom of each carboy. This was the result of a mistake on our end during brewing – AKA over-yeasting the beer. Despite this error we still ended up with a light and fruity brew with a slightly higher than expected alcohol content at around 6%.
All told this whole process took barely 2.5 hours of brew time. In a standard brewing day this means that you could easily trial 3-4 different combinations of hops, malt extract, and all-grain mixes. The main advantage here, as we mentioned above, is the ability to brew multiple batches in a single day – especially for experienced brewers. For new brewers this is also a fun and fast way to get off the ground quick, although it is a little pricier as you’re picking up more ingredients than a non partial-mash method. Again, the main advantage of sous vide here is the temperature. When working on the stove you now have two heat sources (e.g. the element and the sous vide circulator) to quickly move your brew to a boil and even back down through the danger zone.
Keep in mind that this was very much a sous vide experiment, and should generally speaking work with any partial mash recipe. Following the fermentation period comes bottling. This can be a bit tricky, but generally comes down to filtering the brew into your bottling vessels. In our case we used some mason jars, primarily because they were all we had on hand. With that said, being able to easily twist the lids on did cut back on some
Thoughts on the process? We’d love to hear from you in the comments below. More importantly, we strongly encourage you to experiment with your own set of favorite ingredients to taste! Half the fun of brewing is finding combinations of hops, malt, and grains that you enjoy.